FAQ
Tutor Gallery
Tutorials & Documentation
Community
Creating an Example-Tracing Tutor
Learn to use CTAT's Behavior Recorder to build an Example-tracing fraction addition tutor (requires a completed student interface). This tutor is authored by demonstration, without programming.
Introduction
In this tutorial, you will use CTAT's Behavior Recorder to author an Example-tracing Tutor for a basic fraction addition problem. Click here to learn more about Example-tracing Tutors.
Note: You will need an already-complete HTML interface. See our HTML interface tutorial if you need to create one first.
Launching the HTML Interface
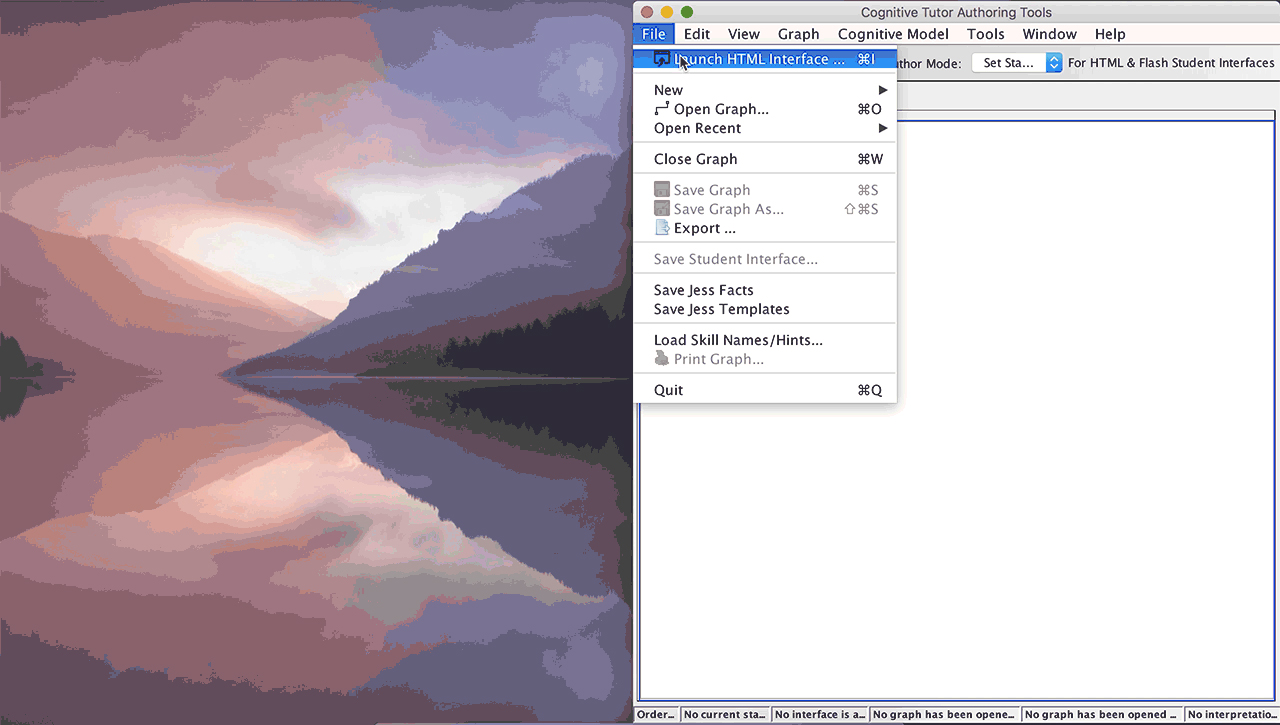
From the CTAT application, click Launch HTML Interface (Cmd/Ctrl + I). This prompt will open your files. Go into your Fraction Addition package, and locate the HTML file. Make sure you select the .html file, not the .ed.html file.
Setting up Your Workspace (optional)
After launching, you’ll have 2 windows open: the student interface and the behavior graph. You may want to adjust your windows so that you can see them side by side.
Initial State
Set an initial state by inputting the values you want in your problem statement. This initial state will be your “template” interface, and for different problems with the same structure you can fix the input.
Start State (1)
Under Graph, select Create Start State (or Cmd/Ctrl + B). The Start State is the state students will see when they first enter the tutor.
Start State (2)
Give the State State a name that will help you remember what’s in the student interface in this state.
Demonstrate
Click and drag to adjust the Text Field boundaries. Under Font in the Properties panel, you can set your desired text size, font, and color (make sure the Text Field is selected).
Done
When your solution is complete, hit Done. This indicates to the graph that the path it recorded is complete.
Return to Start State
After you finish demonstrating a path, return to the Start State by clicking on it. From this state, you can create another path or perform a number of other actions.
Test Tutor
Enter Test Tutor mode to iteratively test your tutor. To test from the beginning, click the Start State in the behavior graph. To test from any other step in the problem, click the desired problem-solving state and the student interface will update accordingly.
Test Demonstrated Solution
Try inputting the path you just inputted. CTAT recognizes the path in the graph as a correct solution, and if you input the same values, the interface should show feedback that the solution is correct.
Test Alternative Solution
Now try a different correct solution. You’ll see that CTAT does NOT recognize this solution as correct, because it isn’t recorded in the behavior graph.
Demonstrate Alternative Solution
Here we’ll demonstrate another path. In your own tutors, try to think of different ways that students might go about solving the problem. With multiple paths recorded in the graph, you can provide feedback for a variety of approaches.
Incorrect Actions (bugs)
Include paths for common missteps in your graph, so that you can provide feedback to address them. Mark these paths as Incorrect Actions (bugs). They will turn red. (CTAT assumes that paths you don’t mark are correct solution paths.)
Set Hint Messages
From Package Name, select the package you created earlier, in step 1. Your interface will be saved in this folder.
Test Hint Messages
In Test Tutor mode, you can test if your Hint message appears as expected. Hit the Hint button in the Hint Widget.
That’s All!
Add any other paths and messages that you want for this problem, then rinse and repeat for other problems in your problem set. Test your completed tutor to make sure it’s good to go!
Table of Contents
Introduction
Set Start State
Launching the HTML Interface
Setting up Your Workspace (optional)
Initial State
Start State (1)
Start State (2)
Demonstrating a Solution
Demonstrate
Done
Return to Start State
Testing a Solution
Test Tutor
Test Demonstrated Solution
Test Alternative Solution
Demonstrate Alternative Solution
Errors and Hints
Incorrect Actions (bugs)
Set Hint Messages
Test Hint Messages
Contact Us
Discuss CTAT with other users and CTAT developers by joining our Google Group. You can also browse the group's archives without joining.


